



How to connect to a VPN in Windows 10: (1) get the VPN details from your provider or company IT (server address, VPN type, account); (2) go to Settings > Network & Internet > VPN > Add a VPN connection; (3) set VPN provider to “Windows (built-in)” and enter the connection name, server address and VPN type (L2TP/IKEv2/SSTP, etc.), username and password > Save; (4) click the connection > Connect; (5) to disconnect, click Disconnect. Company VPNs may require a dedicated client (FortiClient, Cisco Secure Client/AnyConnect, OpenVPN) instead of the built-in VPN. A VPN encrypts your connection and gives secure access to internal resources when working remotely. Note: Windows 10 support ended on 14/10/2025 — consider moving to Windows 11 (the steps are similar).
VPNs and working from home (WFH) became widely discussed during the Covid-19 pandemic.

Security and privacy online are vital for businesses and individuals alike, and protecting data from outside intrusion is a top priority. One of the most effective tools for this is a virtual private network (VPN).
VPNs have become common, and Windows 10 includes the tools to connect to one easily.
A VPN protects information and offers other benefits, such as keeping online transactions secure and, for remote workers, connecting safely to the company’s internal network — essential for continuity and security.
This guide explains how to connect to a VPN in Windows 10, from initial setup to managing the connection, whether you’re an individual protecting your privacy or IT staff setting it up for your organisation.
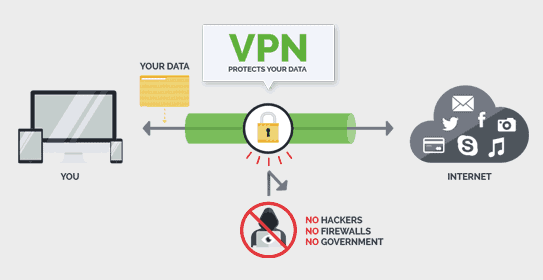
What is a VPN?
A virtual private network creates a secure connection between your device and another network over the internet. All data between your device and that network is encrypted, protecting your information — especially important on public Wi-Fi, where data can easily be intercepted.
Create a VPN profile
Before you can connect, you need a VPN profile on your PC. You can create one yourself or set up a work account to receive a profile from your company.
If it’s for work, look for VPN settings or a VPN app on your company’s intranet, or contact your company’s IT support.
Step 1: Select Start, then Settings > Network & Internet > VPN > Add a VPN connection.
Step 2: In Add a VPN connection:
1. For VPN provider, choose Windows (built-in).
In Connection name, enter a name you’ll recognise (for example, ITSystems).
In Server name or address, enter the VPN server’s address.
2. For VPN type, choose the type of VPN connection your company or service uses.
3. For Type of sign-in info, choose the credential type: username and password, one-time password, certificate or smart card. Enter your username and password if required.
Step 3: Select Save.
Step 4: To edit the connection or add settings such as a proxy, select the VPN connection and choose Advanced options.
Connect to the VPN
Once you have a profile, you’re ready to connect.
Step 1: At the far right of the taskbar, select the network icon.

Step 2: Select the VPN connection you want to use, then select Connect.
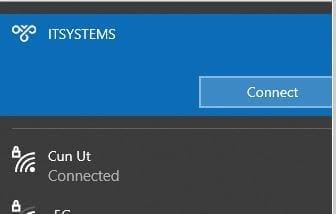
If prompted, enter your username and password or other sign-in details.
When connected, Connected appears under the VPN connection name.
Conclusion
A VPN is an effective security measure and an essential tool for privacy and safe online activity. For organisations, it acts as a shield that lets staff work remotely without worrying about security risks.
Connecting to a VPN isn’t complicated, but you need to understand setup and management. Choose the right provider, configure it properly and check connection security regularly.
Whether you’re an individual or a business needing an organisation-wide solution, mastering VPN use is an important step. Related reading: Synology Central Management System and remote work.
Contact IT Systems Vietnam
For business VPN setup, contact IT Systems at hotline 028.3995.03.59 or contact@itsystems.com.vn. Follow us on Facebook and YouTube.
Unstable office network that needs redesigning?
IT Systems surveys, designs and deploys LAN, Wi-Fi, firewall and VPN for offices and branches, with full documentation.


