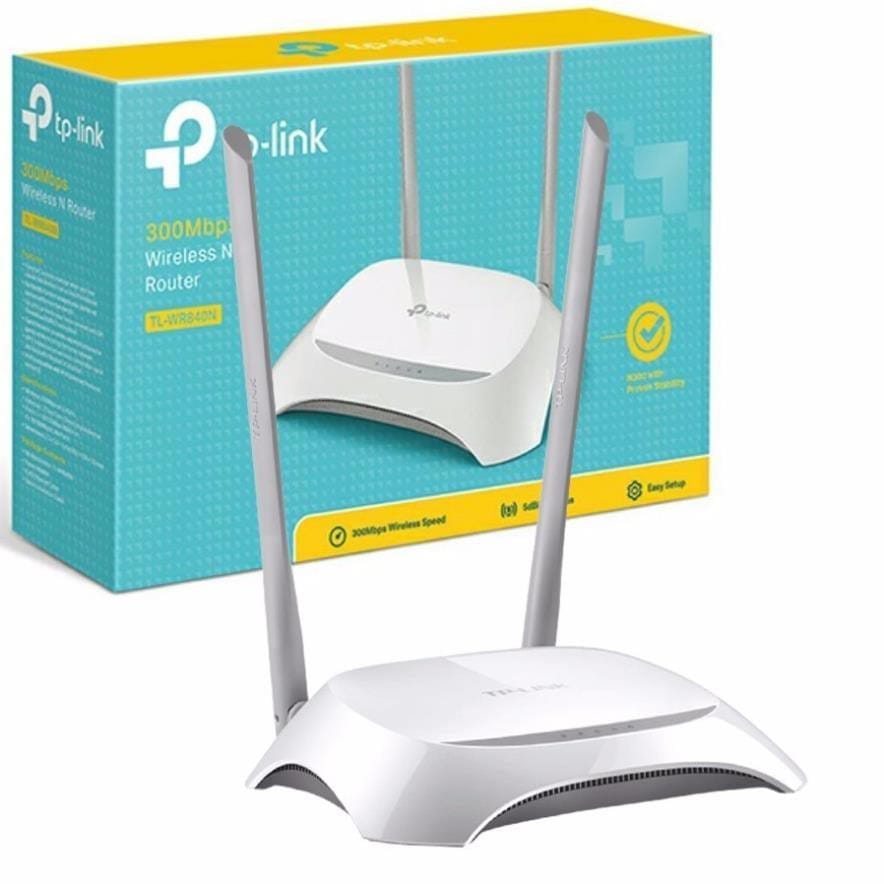
How to configure a TP-Link WiFi router: (1) power on the router, connect a cable from the modem to the WAN port (usually blue), and connect your computer to a LAN port (or to the default Wi-Fi printed on the router’s label); (2) open a browser and go to 192.168.0.1 or tplinkwifi.net; (3) log in (older models often use admin/admin; newer ones ask you to create an admin password the first time); (4) run Quick Setup: choose the internet connection type (Dynamic IP/PPPoE — enter the ISP username and password for PPPoE); (5) set the WiFi name (SSID) and a strong password (WPA2/WPA3); (6) change the admin password; (7) save and reboot. Advanced: separate 2.4/5 GHz bands, enable a Guest Network and update the firmware. If you can’t reach the setup page, reset the router (hold Reset for about 10 seconds).
1. About TP-Link routers
TP-Link routers are among the most popular network devices, valued for performance, durability and rich features. Whether you use one at home or in a business, configuring it properly keeps your WiFi stable and meets your needs.
2. Before you start
2.1. Check the hardware
- Make sure the router is plugged in and has started up.
- Check that a network cable runs from the modem to the router’s WAN port.
- Have a computer, laptop or mobile device ready to open the setup page.
2.2. Find the login details
The default login details are usually printed on the bottom of the router:
- Default IP address: 192.168.0.1 or 192.168.1.1 (or tplinkwifi.net)
- Username/password: admin/admin on older models; newer models ask you to create a password
2.3. Connect to the router
- Join the router’s default WiFi network (the default SSID is also on the label).
- Or connect directly with a LAN cable.
3. How to configure TP-Link WiFi
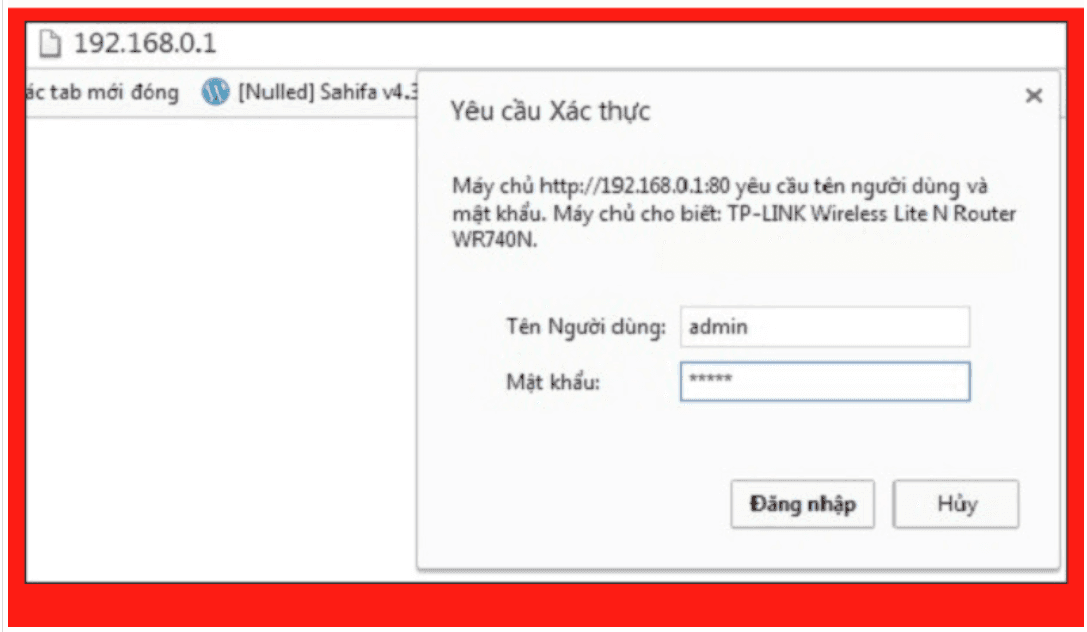
3.1. Log in to the router
- Open a web browser (Chrome, Firefox or Edge).
- Enter
http://192.168.0.1orhttp://192.168.1.1in the address bar. - Enter the username and password. If they’ve been changed, use the new details.
3.2. Basic setup
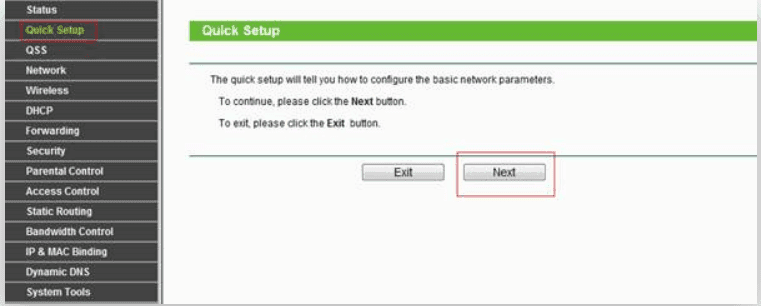
- After logging in, you’ll see the router’s main interface.
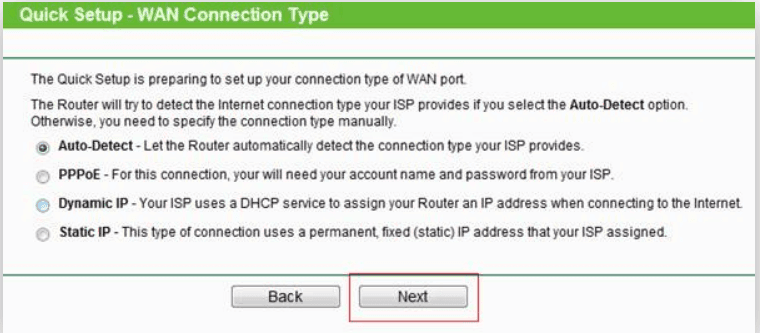
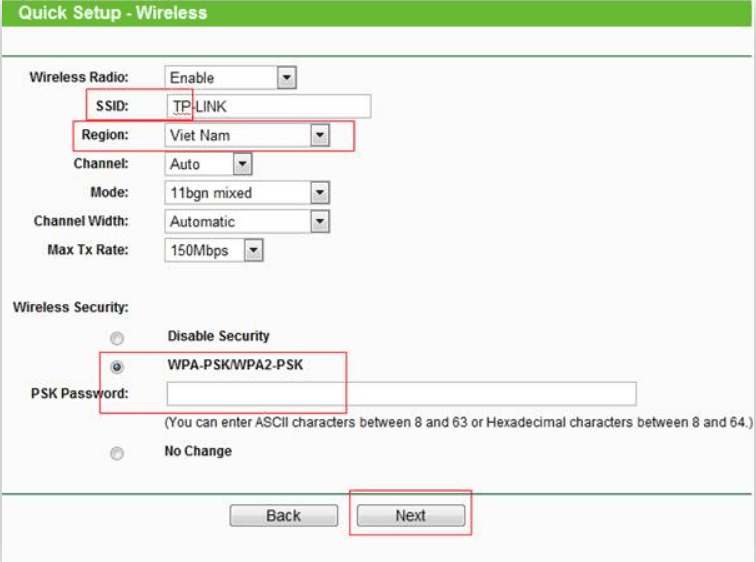
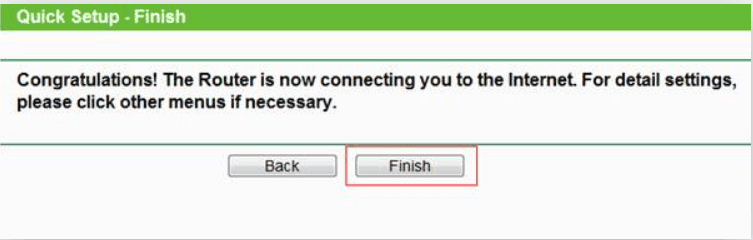
- Choose Quick Setup and follow the on-screen steps:
- Region: choose your region (e.g. Vietnam).
- Connection Type: choose the type your ISP uses — often PPPoE.
- Enter the PPPoE username and password if required (provided by your ISP).
3.3. Configure WiFi
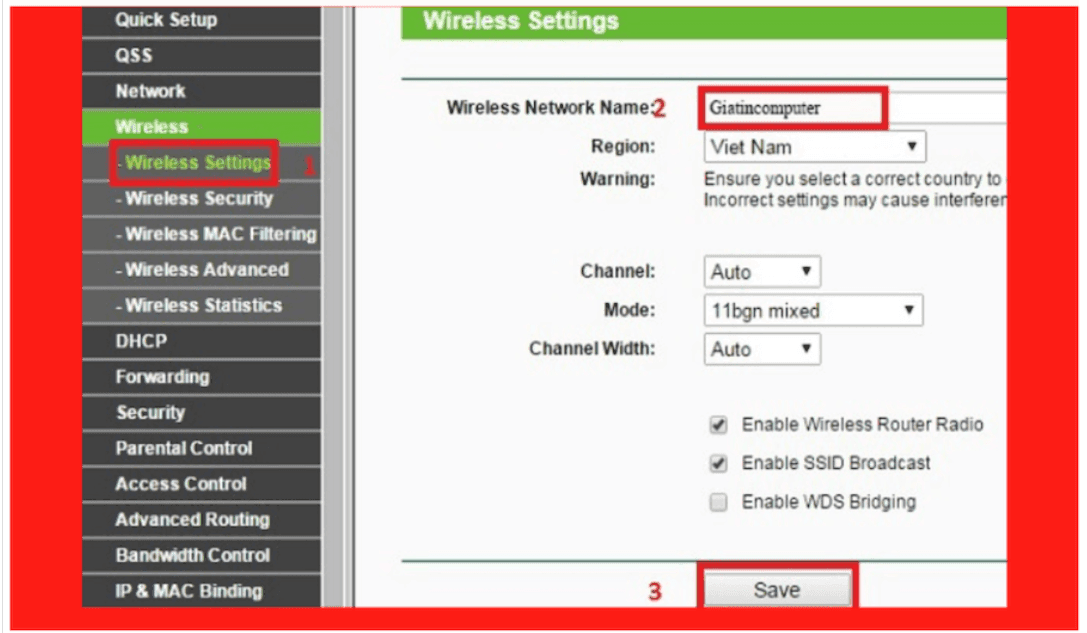
- Go to Wireless or WiFi Settings.
- Set the WiFi parameters:
- SSID: the name of your WiFi network.
- Channel: Auto is usually best to avoid interference.
- Security: WPA2-PSK (or WPA3 if supported).
- Password: at least 8 characters — longer and more complex is better.
- Click Save.
3.4. Advanced settings (optional)
- Bandwidth Control: limit bandwidth so devices share resources fairly.
- Guest Network: a separate WiFi network for visitors.
- Parental Controls: monitor and limit internet access for specific devices.
3.5. Reboot the router
When you’ve finished, restart the router to apply all changes — under System Tools > Reboot.
4. Troubleshooting
4.1. Can’t log in to the router
- Check the connection between your device and the router.
- Make sure you entered the correct router IP address.
- Reset the router to factory defaults by holding the Reset button for 10–30 seconds.
4.2. WiFi isn’t broadcasting
- Check that the router is on.
- Make sure WiFi is enabled in the router’s settings.
- Set the password or SSID again if needed.
4.3. Connected to WiFi but no internet
- Check the connection between the router and the modem.
- Make sure the PPPoE details are correct.
- Contact your ISP if needed.
5. Tips for better WiFi
- Router placement: put it in the centre of your home or office, away from interference such as microwaves and cordless phones.
- Firmware updates: check and update the firmware regularly for better performance and security.
- Use 5 GHz: if supported, use the 5 GHz band for higher speeds and less interference.
6. Conclusion
Configuring TP-Link WiFi is simple but should be done carefully so the network runs reliably. If you need help setting up your network, IT Systems Vietnam can advise and support you.
Contact IT Systems Vietnam
Contact IT Systems at hotline 028.3995.03.59 or contact@itsystems.com.vn. Follow us on Facebook and YouTube.
Unstable office network that needs redesigning?
IT Systems surveys, designs and deploys LAN, Wi-Fi, firewall and VPN for offices and branches, with full documentation.