


Windows 11 offers many personalization options, including changing themes. However, many users find that changing the theme also changes desktop icons and the mouse pointer, which takes away the familiar look. How do you keep these when you change the theme?
Quick summary: When you change a Windows 11 theme, desktop icons and the mouse pointer often change too. This article shows how to keep the original desktop icons through Settings or Registry Editor, mix theme icons with default icons, and keep the original mouse pointer.
This article walks you through each step.
Quick answer: When you change a Windows 11 theme, the theme often replaces desktop icons (This PC, Recycle Bin…) and the mouse pointer. To keep the default icons: right-click the desktop > Personalize > Themes > Desktop icon settings, restore the standard icons and untick “Allow themes to change desktop icons”. To keep the default pointer: Settings > Bluetooth & devices > Mouse > Additional mouse settings > Pointers tab > choose the Windows Default scheme and untick Allow themes to change mouse pointers. Apply the theme first, then adjust these two settings.
Keep the original desktop icons when changing themes (Settings)
For example, suppose you added a Star Wars theme. As you can see, the default icons changed along with the theme.
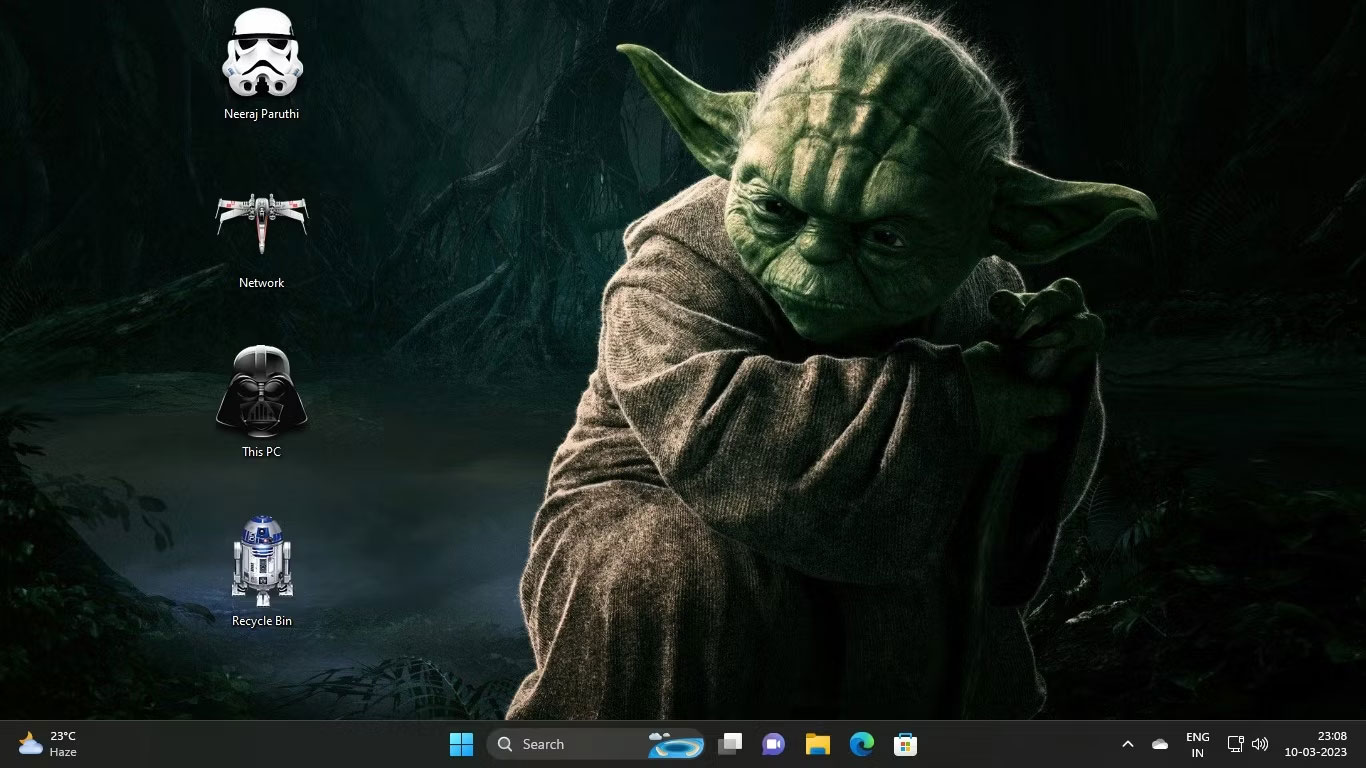
If you prefer Windows’ default icons to the ones the new theme provides, you can easily stop any theme from changing your desktop icons:
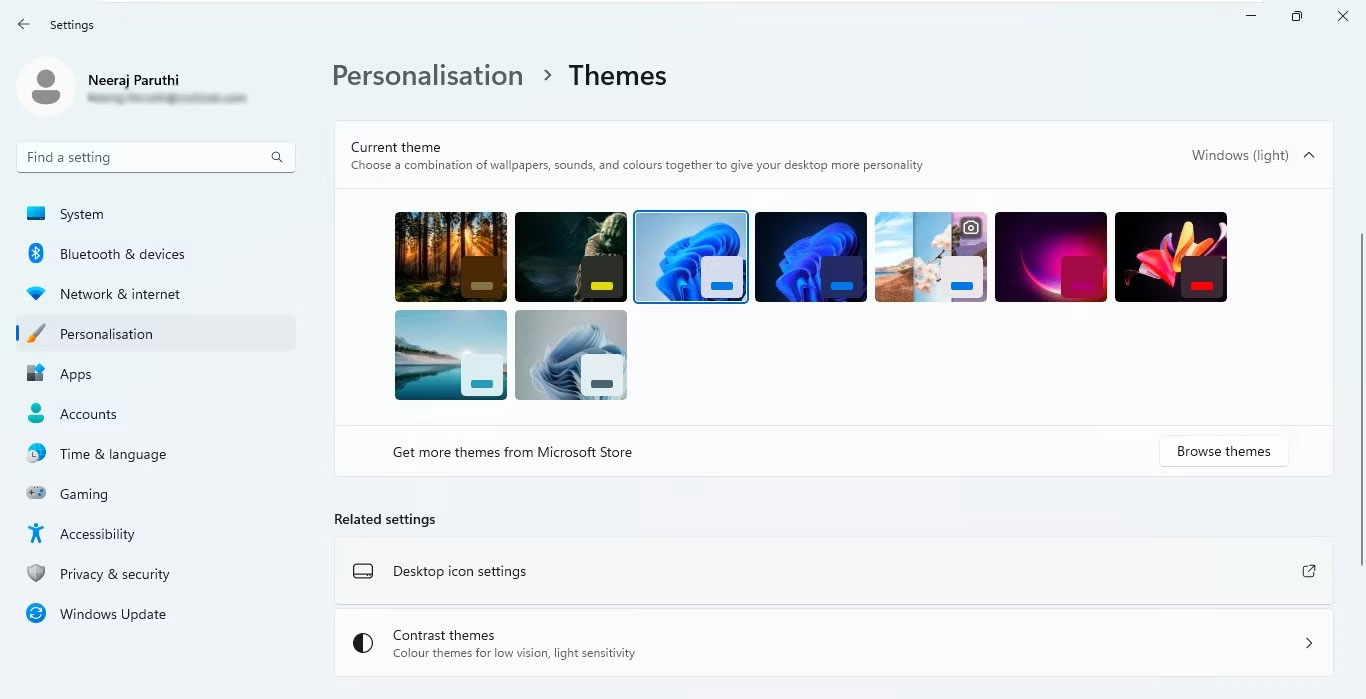
1. Right-click the desktop, choose Personalize, then choose Themes in the Personalization settings.
2. In Themes, under Related settings, click Desktop icon settings.
3. In the Desktop Icon Settings window, untick Allow themes to change desktop icons.
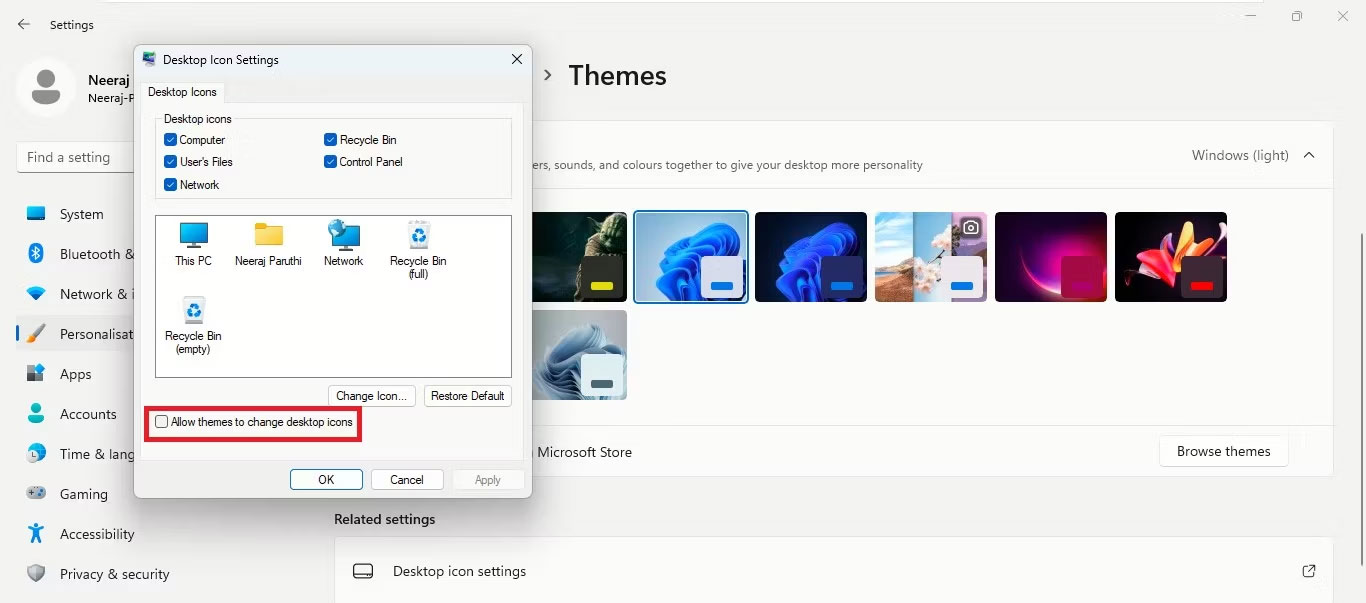
4. Finally, click Apply > OK.
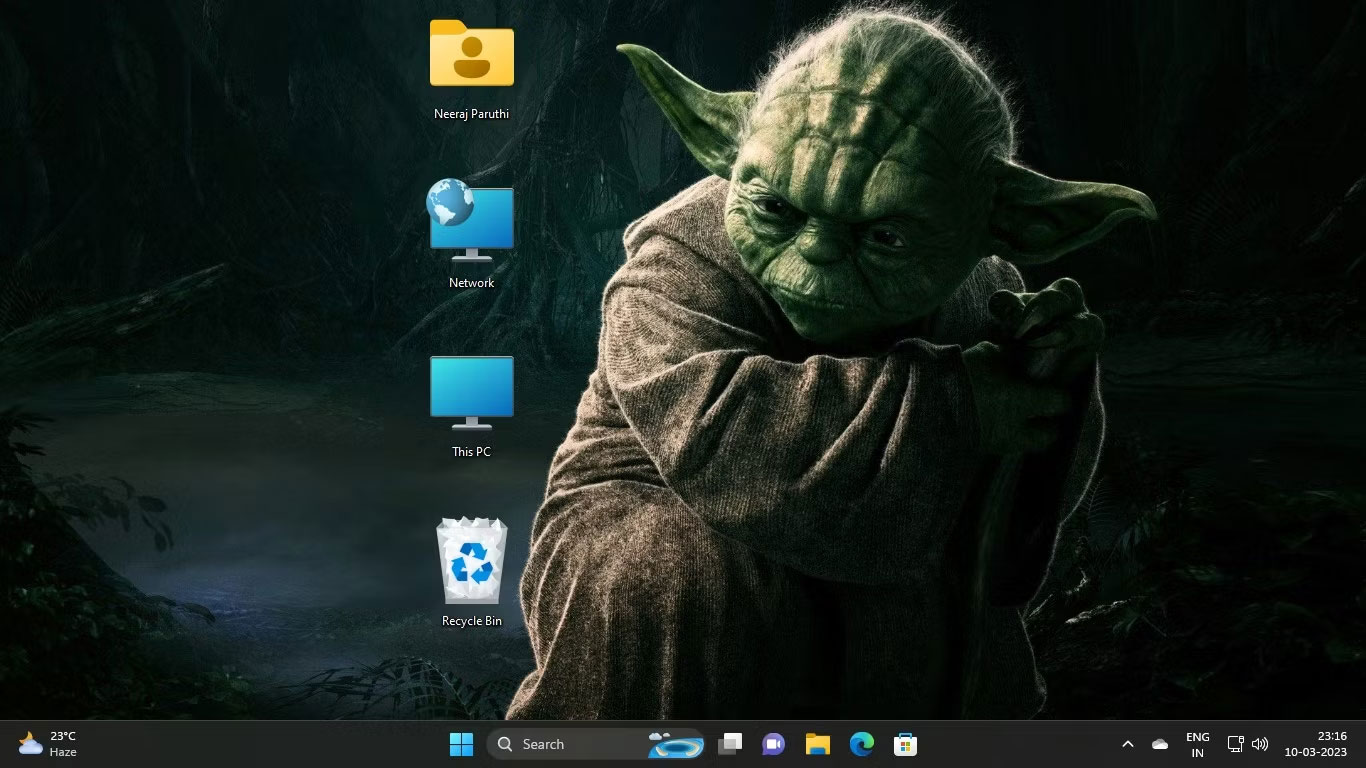
From now on, your default desktop icons will not change when you change themes.
Mix theme icons and default desktop icons
Suppose you only like two of the new theme’s desktop icons and want to keep the other default icons. You can do that too. Using the Star Wars theme again: you do not want Darth Vader as the This PC icon or R2-D2 for the Recycle Bin, but you do want the Stormtrooper for Files and the X-Wing Starfighter for Network.
Here is how:
1. Right-click the desktop and choose Personalize > Themes > Desktop icon settings.
2. In Desktop Icon Settings, select each theme icon you want to change. First select This PC (Darth Vader), as in the screenshot below, then click Restore Default.
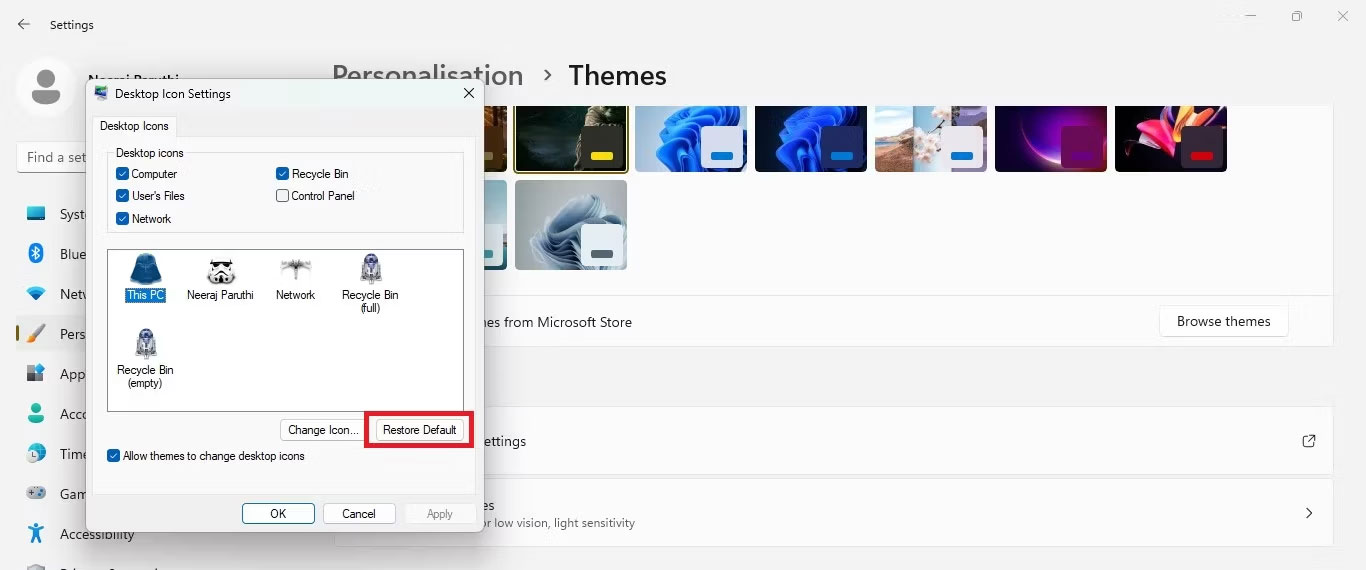
The theme icon changes back to the default icon in the desktop icon settings.
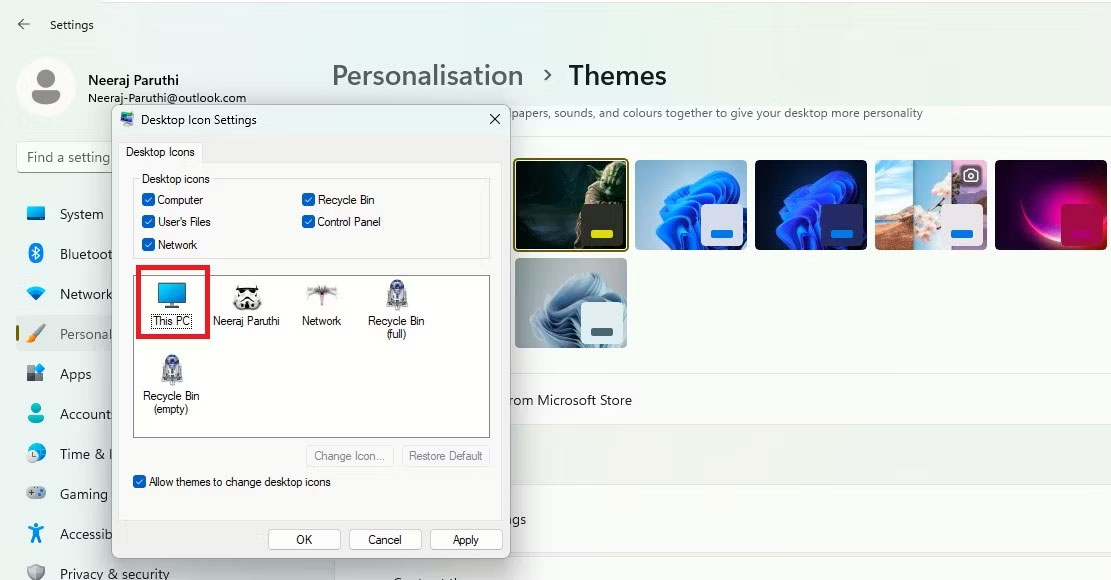
3. Now change the Recycle Bin (R2-D2) back to its default icon.
4. Finally, click Apply > OK.
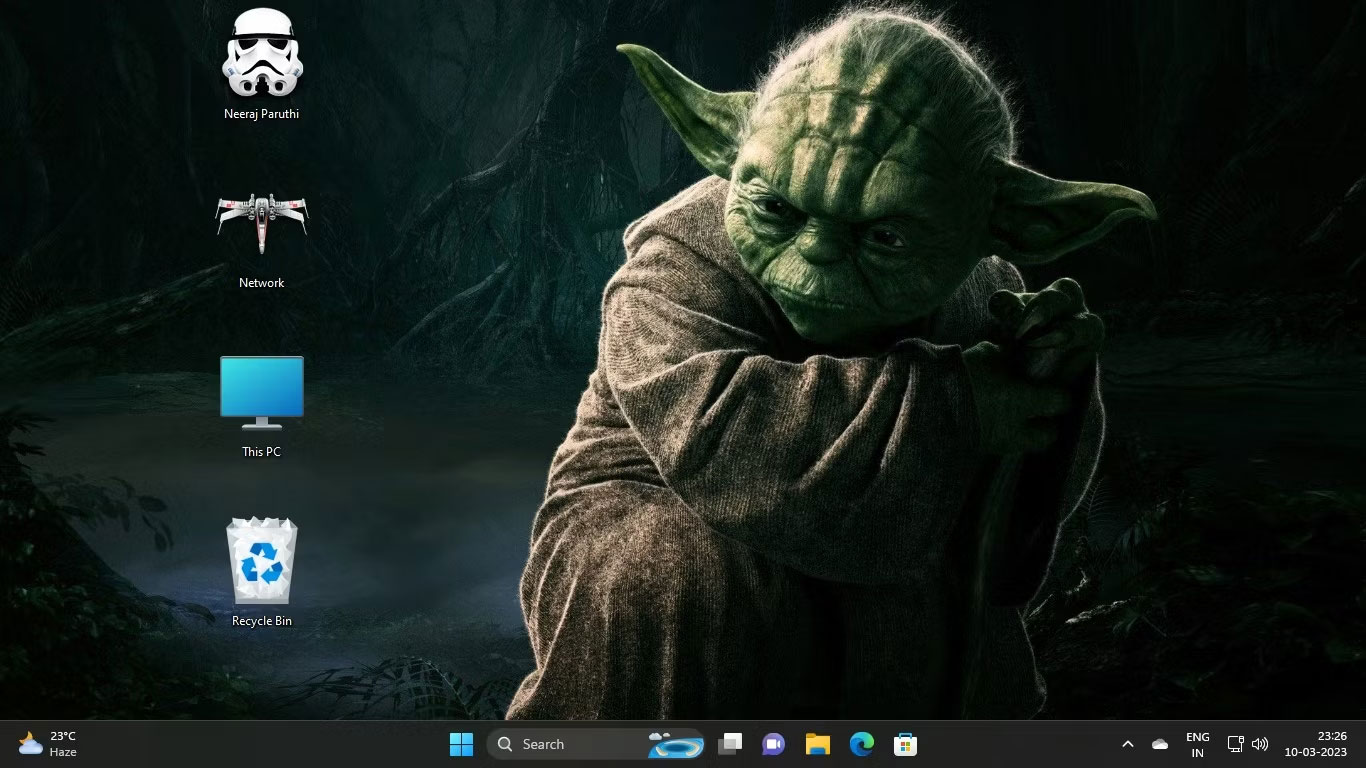
Now you can enjoy a personalised Windows with all desktop icons customised the way you like when you change themes.
Keep the original desktop icons when changing themes (Registry Editor)
You can also use Registry Editor to make sure themes do not change desktop icons. Be careful when editing the Registry; create a restore point first in case something goes wrong. Then follow these steps:
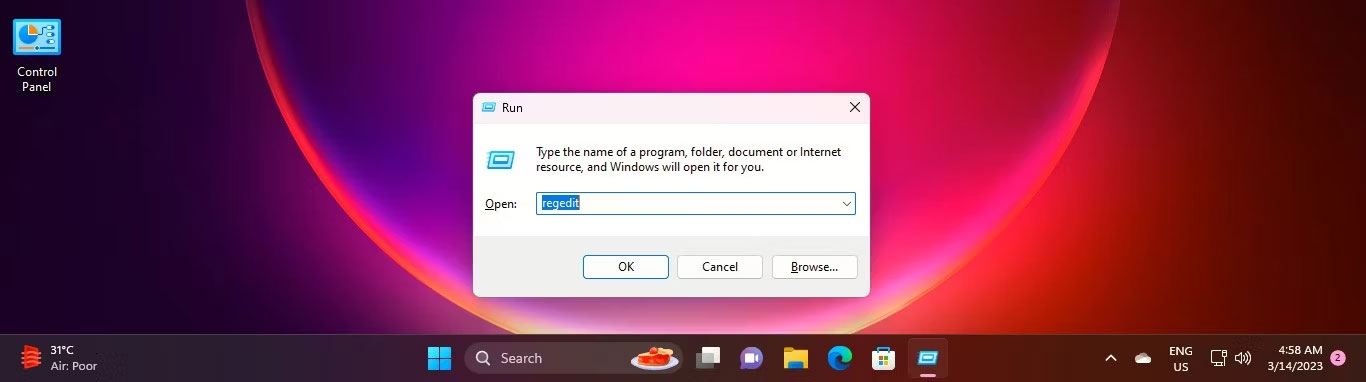
1. Press Win + R to open Run, type regedit and press Enter (or open Registry Editor another way). Click Yes at the UAC prompt.
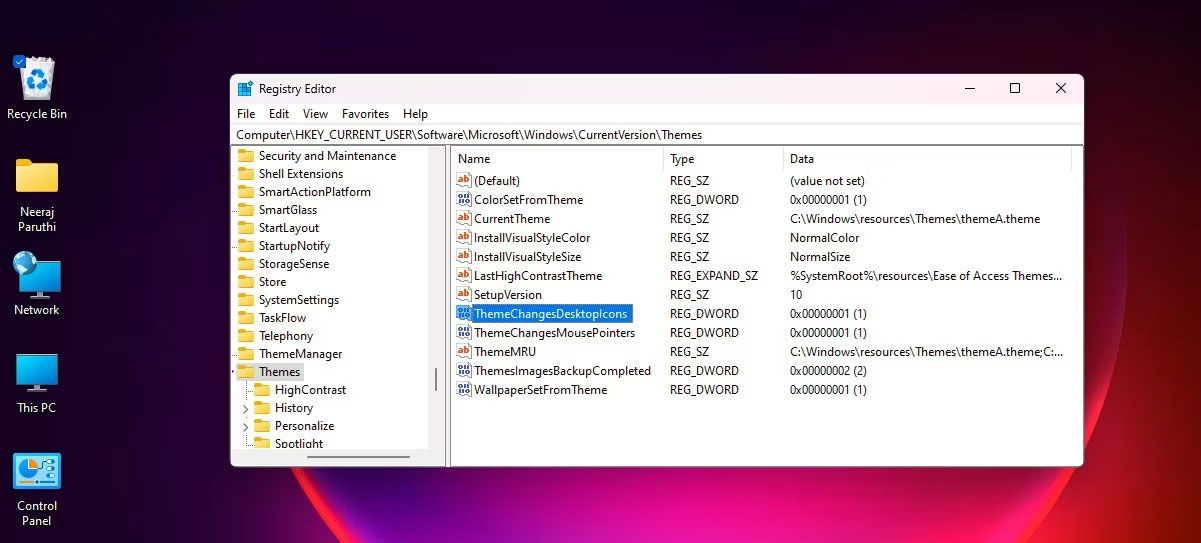
2. Go to the Themes key:
HKEY_CURRENT_USER\Software\Microsoft\Windows\CurrentVersion\Themes3. In the right pane, double-click DWORD: ThemeChangesDesktopIcons.
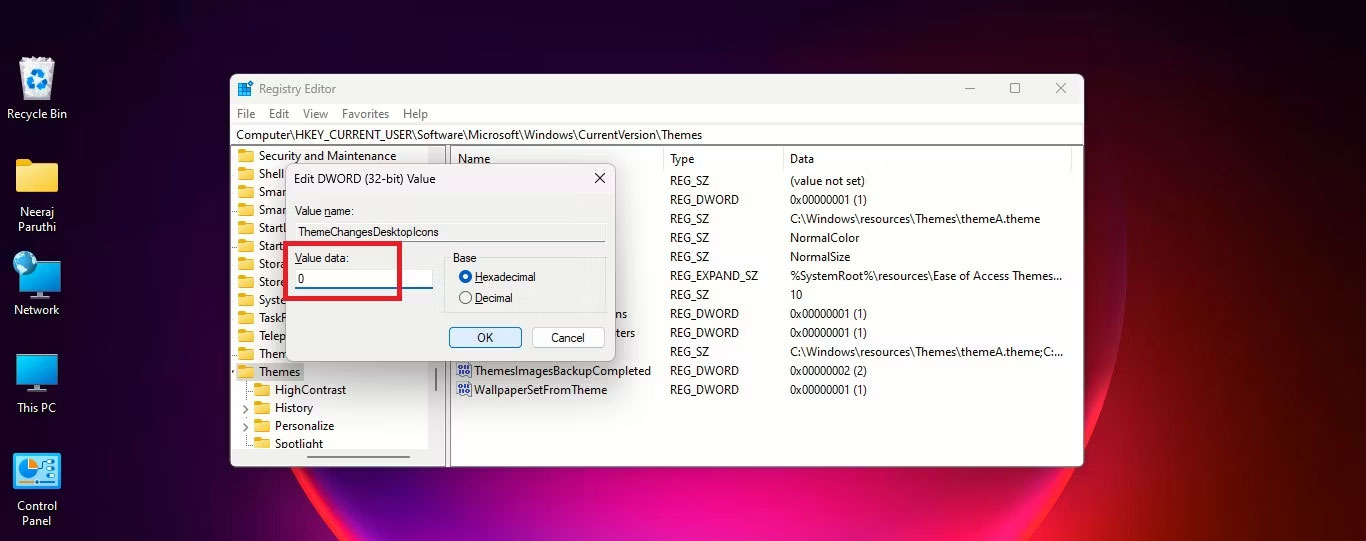
4. In the Edit DWORD window, change Value data from 1 to 0 and click OK.
5. Close Registry Editor. Now, when you switch to a new theme, the desktop icons will not change. To reverse this, go back to:
HKEY_CURRENT_USER\Software\Microsoft\Windows\CurrentVersion\ThemesDouble-click DWORD: ThemeChangesDesktopIcons and change Value data to 1. New themes will then be able to replace the default desktop icons again.
Keep the original mouse pointer when changing themes
Changing the theme can also change the default mouse pointer. The Star Wars theme uses a lightsaber pointer. It looks eye-catching, but it is not practical when working on documents.
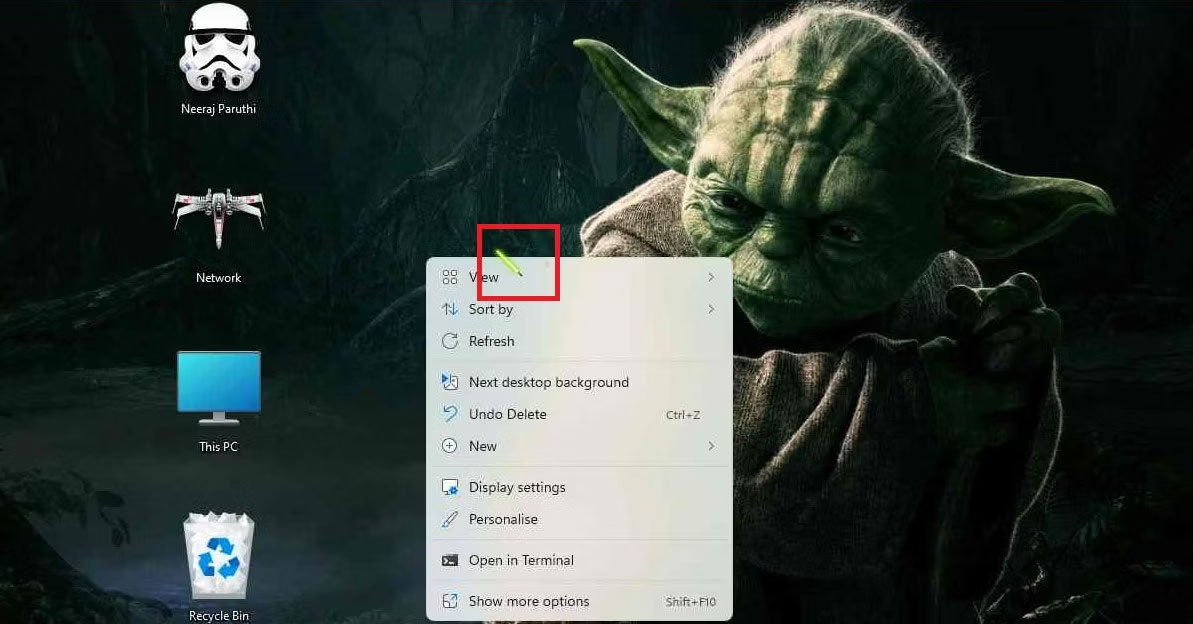
You can easily restore the default arrow pointer. In the Registry:
1. Go to the same Themes key you used for the desktop icons:
HKEY_CURRENT_USER\Software\Microsoft\Windows\CurrentVersion\Themes2. In the right pane, just below DWORD: ThemeChangesDesktopIcons, find DWORD: ThemeChangesMousePointers.
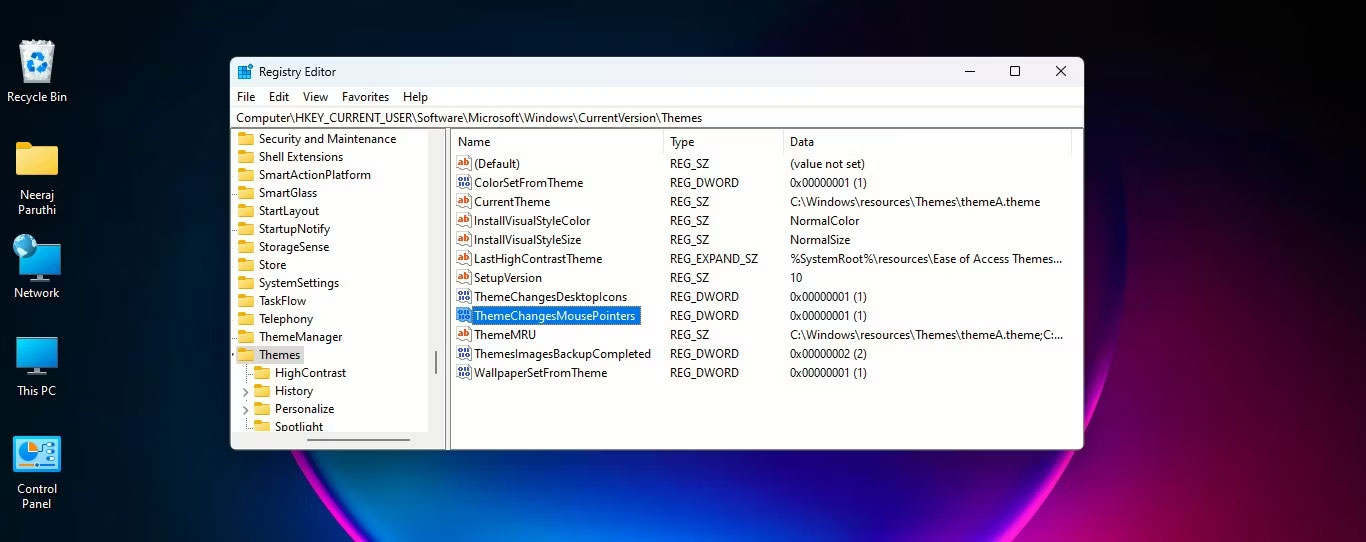
3. Double-click it, change Value data to 0 and click OK.
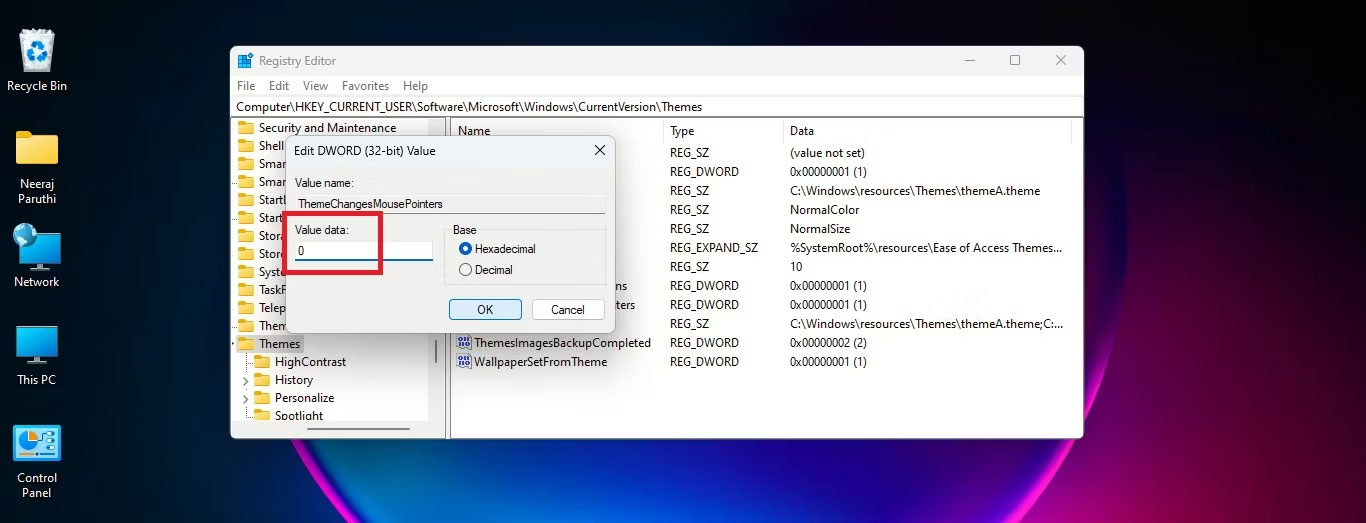
The default Windows arrow pointer will now appear in new themes you apply. You can also choose the Windows Default scheme on the Pointers tab of Mouse Properties.
Keeping your desktop icons and mouse pointer when changing Windows 11 themes is entirely possible. Follow the steps above to customise Windows 11 to your taste while keeping a familiar look.
See related IT Systems services with professional technical support through multiple channels: IT Support services
FAQ
Why do desktop icons change when I change the Windows 11 theme?
Themes may replace desktop icons and pointers by default. Untick “Allow themes to change desktop icons” in Desktop icon settings to keep the originals.
How do I keep my mouse pointer when changing themes?
In Mouse Properties > Pointers, untick “Allow themes to change mouse pointers”.
Do themes affect performance?
Very little. Transparency and animated wallpapers can use extra resources on weak PCs; you can turn off Transparency effects.
Need a technician to check your computer on site?
IT Systems repairs desktops and laptops on site in Ho Chi Minh City, offers remote support within 30 minutes and quotes for your approval before any repair.


