
Quick answer: scanning documents with an HP, Canon or Brother multifunction printer: (1) prepare: the printer is connected (USB or Wi-Fi) with full drivers installed; place the document face down on the glass or in the automatic document feeder (ADF); (2) use the manufacturer’s software: HP Smart (HP), Canon IJ Scan Utility (Canon), Brother iPrint&Scan / ControlCenter (Brother); choose the type (Document/Photo), resolution (300 dpi for text), format (PDF/JPG) and save location; (3) or use Windows Scan / Windows Fax and Scan, or Image Capture on macOS; (4) click Scan and check the file. Tips: scan multiple pages into one PDF with the ADF, turn on OCR so the text is searchable, and scan directly to email or a network folder if the printer supports it.
A multifunction printer is not just for printing; it is also a useful tool for digitising documents. Scanning makes documents easy to store, share and search. This guide explains step by step how to scan with popular printers such as HP, Canon and Brother.
Before you scan
- Connect the printer: make sure it is connected to the computer with the full driver installed.
- Power on: turn on the printer and computer.
- Place the document: put it on the scanner glass or in the ADF (automatic document feeder).
- Choose software: use the software supplied with the printer or another scanning tool such as Windows Fax and Scan.
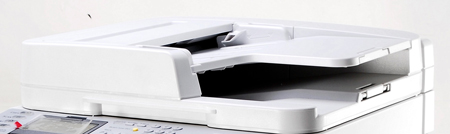
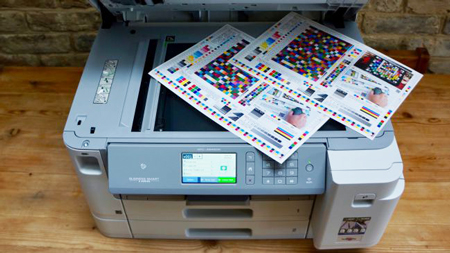
A multifunction printer can scan from two places: the flatbed glass and the ADF tray (some compact models have no ADF).
How to scan with an HP, Canon or Brother multifunction printer
Place the document on the glass or in the ADF. On the glass, follow the arrows at the edge to position the page correctly. In the ADF, place the side you want to scan face up with the top of the page going in first (check the icon on your model, as some feeders differ).
1. Scanning with the manufacturer’s software
When installing the driver, also install the scanning software. The manufacturer’s software offers the best image processing, PDF output and other features.
Step 1: Open the printer software. The interface varies by brand.
Step 2: Choose the source: glass or ADF, depending on the document.
Step 3: Choose the file format (PDF, JPEG, TIFF and so on).
Step 4: Set the resolution. Higher resolution gives better image quality but larger files.
Step 5: Choose the colour mode (black and white, greyscale or colour) to suit the document.
Step 6: Click Scan or Start.
Step 7: Choose where to save the file and give it a name.
2. Scanning with Windows
Step 1: Open Control Panel > Devices and Printers.
Step 2: Right-click your multifunction printer and choose Start scan.
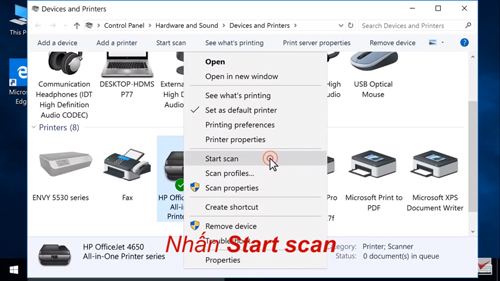
Step 3: Adjust these settings for the best result:
- Profile: Document for text, Photo for pictures.
- Colour format: choose Colour to scan in colour.
- File type: the output format (PDF or image).
- Resolution: the scan resolution.
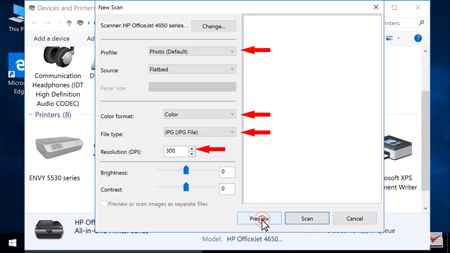
Step 4: Click Scan.
Tips for better scans
- Clean the scanner: wipe the glass and other parts to keep images clean.
- Adjust brightness: make sure the image is neither too light nor too dark.
- Choose the right format: pick a file format that suits how the document will be used.
- Edit afterwards: use image editing software to adjust colour and contrast if needed.
Many modern multifunction printers also offer advanced scanning features:
- Duplex scanning: automatically scans both sides of the page, saving time.
- Optical character recognition (OCR): turns scanned documents into editable, searchable text.
- Cloud storage: some printers can save scans directly to services such as Google Drive or Dropbox.
Scanning with a multifunction printer is a useful skill for digitising documents quickly and easily at home or in the office. For office printer setup and support, contact IT Systems at hotline 028.3995.03.59 or contact@itsystems.com.vn.
Need a technician to check your computer on site?
IT Systems repairs desktops and laptops on site in Ho Chi Minh City, offers remote support within 30 minutes and quotes for your approval before any repair.