Email is an essential communication tool for work and daily life. Microsoft 365 provides a professional, reliable email solution with a rich set of features. This guide shows how to create an Outlook email account in Microsoft 365 quickly and easily.
Summary: Microsoft 365 provides professional Outlook email on your company domain. This article explains why to choose Microsoft 365 and how administrators create Outlook email accounts for staff in the Microsoft 365 admin center.
Quick answer: creating an Outlook email account in Microsoft 365: this is done by an administrator in the Microsoft 365 admin center: (1) sign in to admin.microsoft.com with an admin account; (2) go to Users > Active users > Add a user; (3) enter the full name and username (an address on your company domain, e.g. name@company.com); (4) set a password (or auto-generate one and require a change at first sign-in); (5) assign a licence that includes Exchange Online (e.g. Microsoft 365 Business Standard) so the user gets an Outlook mailbox; (6) finish and send the sign-in details to the user; (7) the user signs in to Outlook (web at outlook.office.com or the app). To use your own domain, verify it in Microsoft 365 first.
Why choose Microsoft 365?
Microsoft 365 is more than an office suite: it is a complete work platform for individuals and businesses.
Outlook: a smart email client that does much more than send and receive email:
- Smart email management: automatic sorting, rules and fast search.
- Calendar: schedule meetings, events and appointments easily.
- Contacts: manage your contact lists professionally.
- Integration: works seamlessly with Teams and other Microsoft 365 apps.
Word, Excel and PowerPoint: the familiar office apps. With Microsoft 365 you can create professional documents, collaborate in real time with others on the same file, and work from any device with an internet connection.
OneDrive: secure cloud storage with plenty of space to store files, sync them across devices, share them easily and restore files deleted by mistake.
Teams: a collaboration hub for chat, online meetings and webinars, file sharing in channels and teamwork on projects.
Security: multi-factor authentication, threat detection and compliance with strict security standards help protect your data.
Continuous updates: Microsoft constantly improves Microsoft 365, so you always have the latest tools.
How to create an Outlook email account in Microsoft 365
Step 1: Sign in to the Microsoft 365 admin center
Sign in at https://admin.microsoft.com/ with the administrator account provided when you subscribed.
Step 2: Create the first mail account
Once signed in, follow the screenshots below to create a new mailbox.

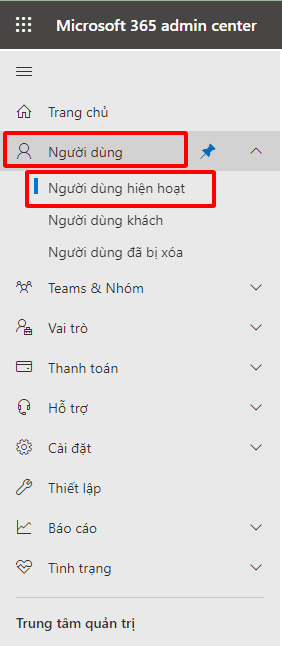
Click the ☰ icon to show more menu items, then click Users > Active users.
Click Add a user.

Enter the user’s details:
- First name: the user’s given name
- Last name: the family name
- Display name: the name shown for the mailbox
- Username: the mailbox name to create
- Domain: the domain for the email address
- Automatically create a password: tick if you want a generated password
Click Next.

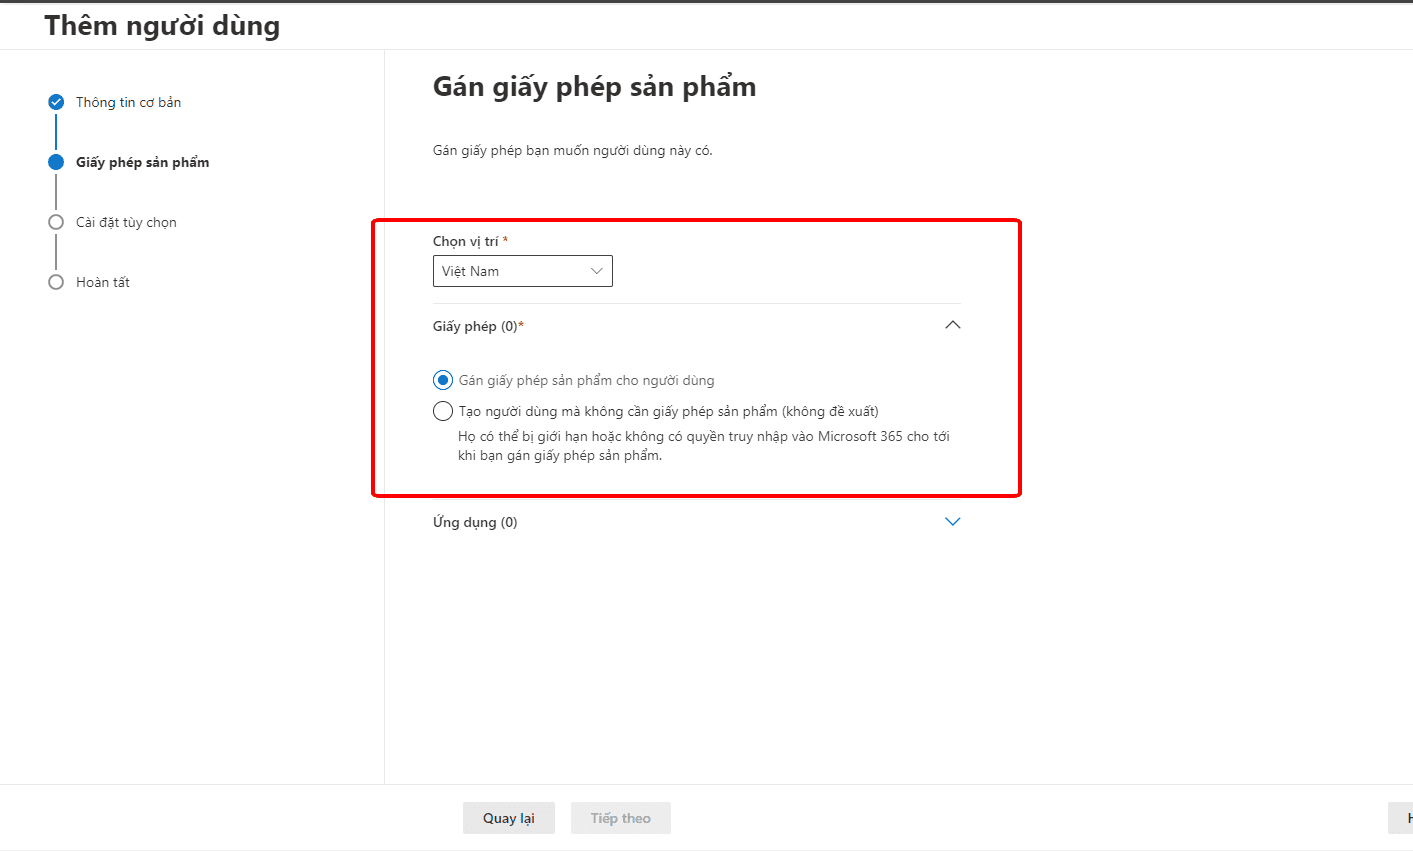
Next, choose:
- Select location: your country.
- Assign a product licence to the user: choose which licensed products the account can use.
- Create user without product licence (not recommended): the account gets no licensed products, so no mailbox.
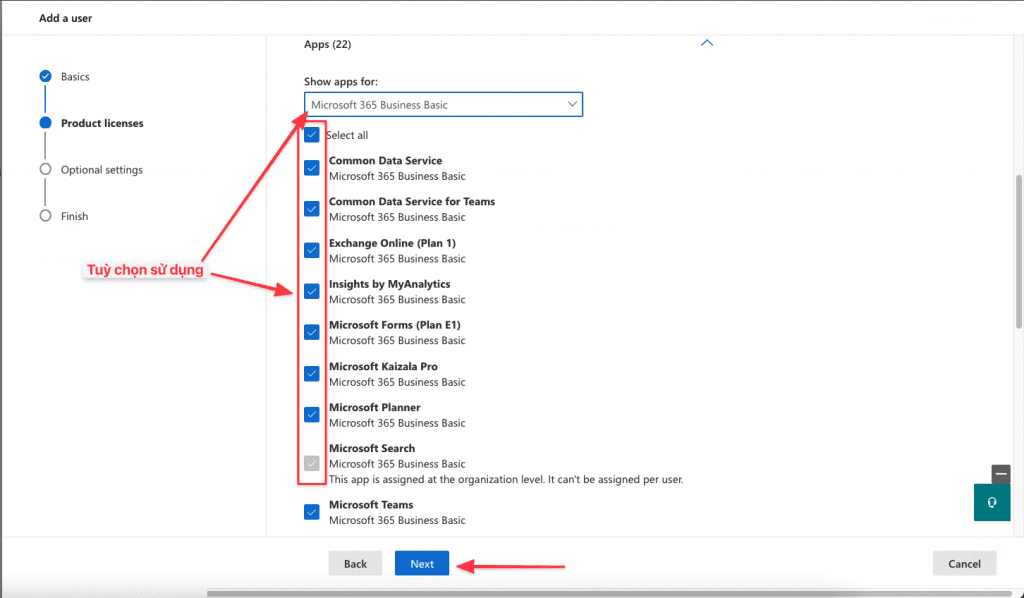
You can also tick or untick the individual apps and services included in the licence.
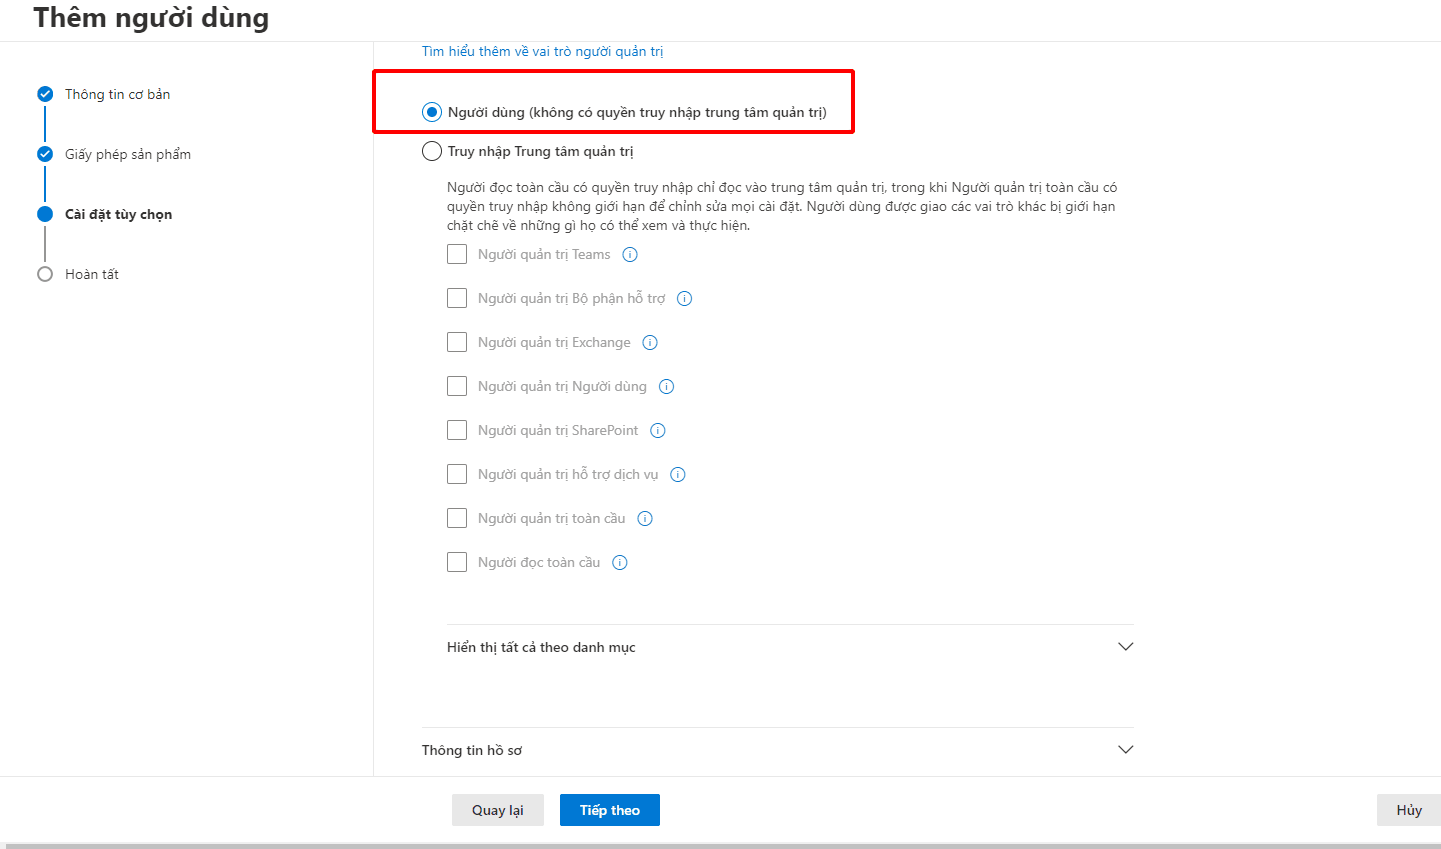
Then choose whether the account can access the admin center:
- User (no admin center access): the user cannot open the admin center.
- Admin center access: allows access to the admin center; if selected, choose the roles to assign.
Here we create a normal user, so select User (no admin center access) and click Next.
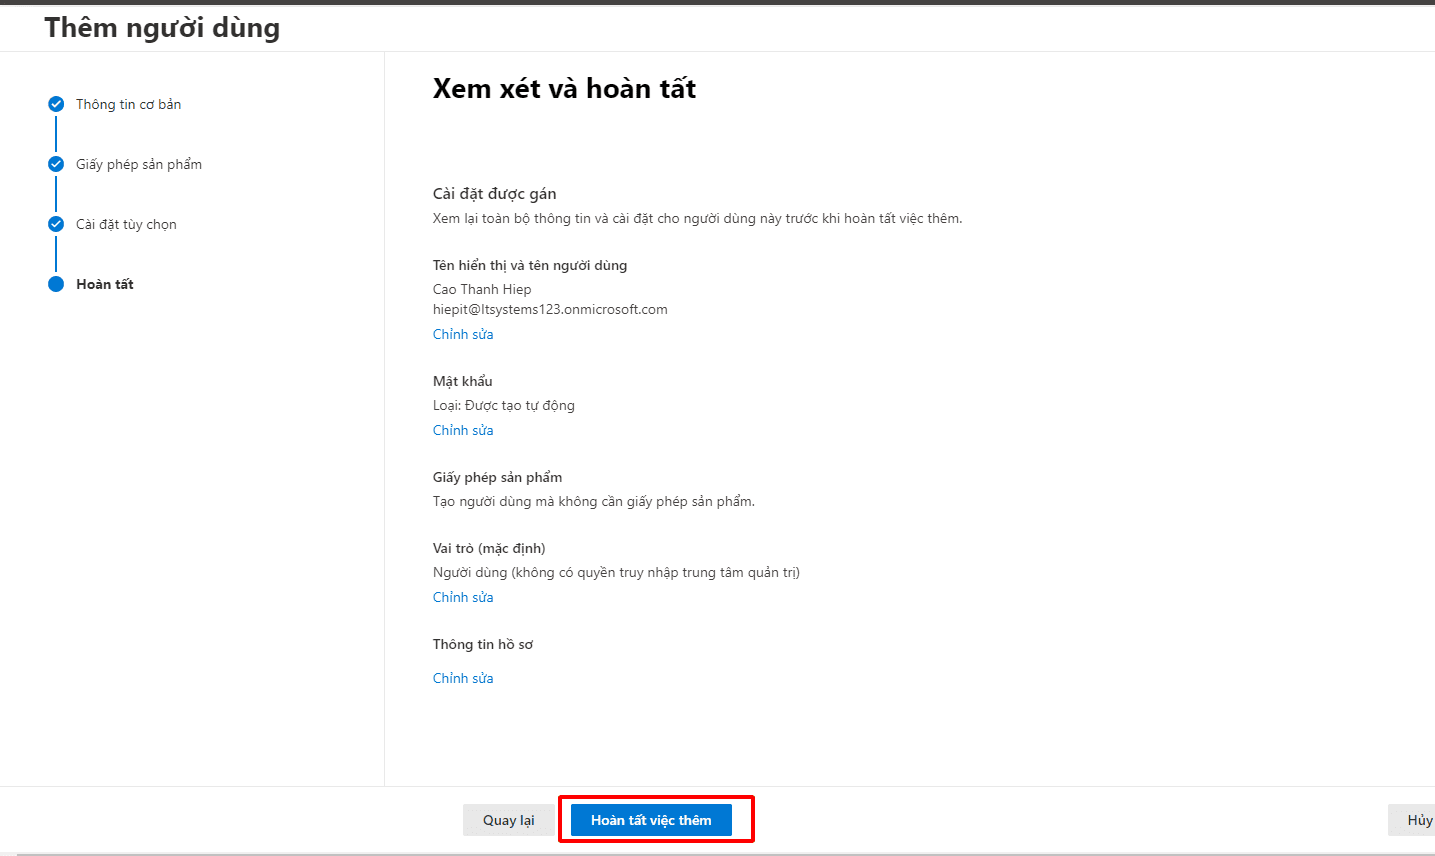
Review the details. Click Edit to change anything, or Finish adding when everything is correct.
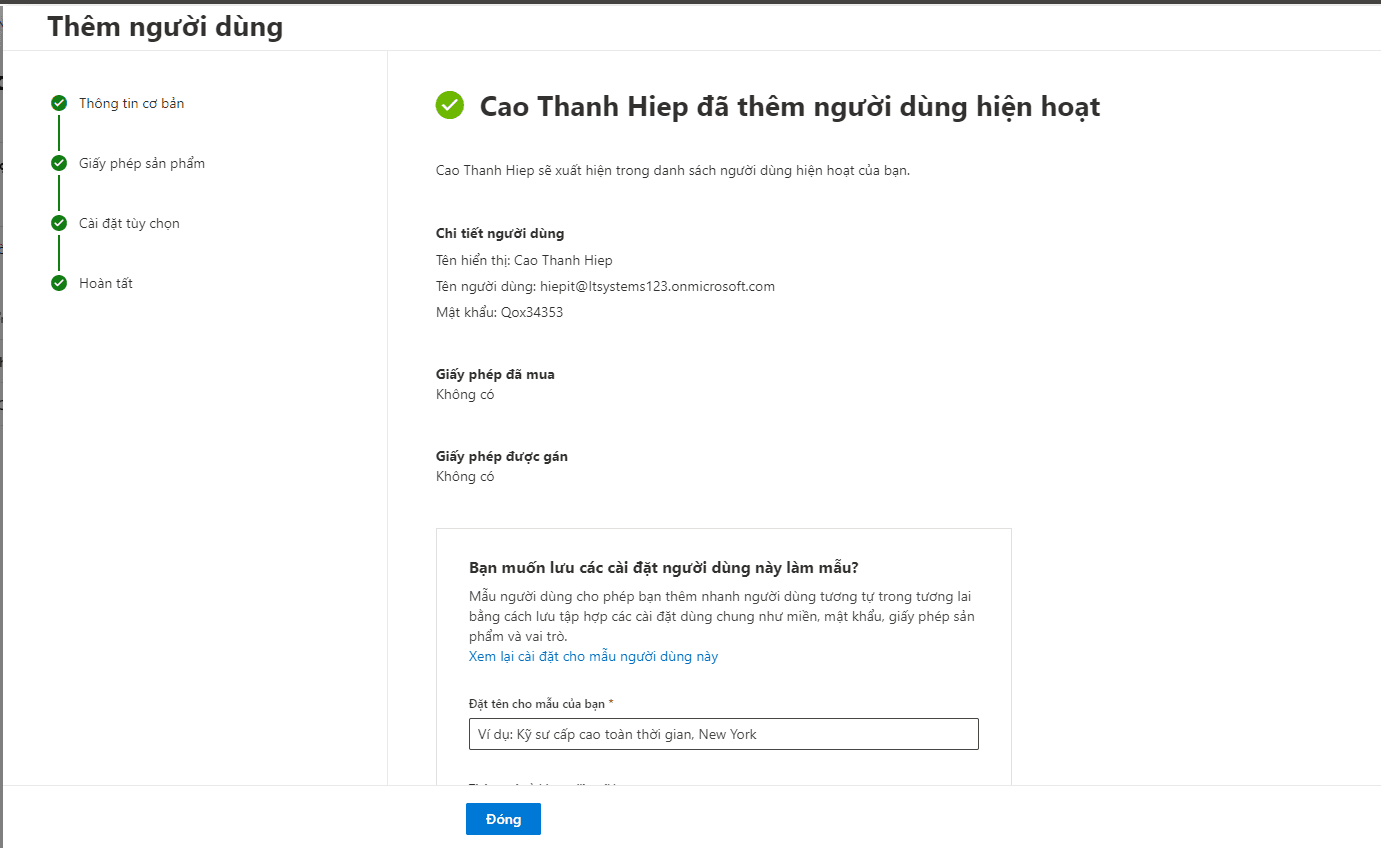
The account details are then shown. Save them and send them to the user securely.
Step 3: Sign in and send email
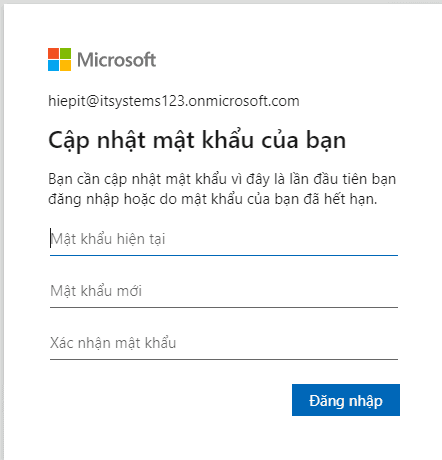
Microsoft 365 email can be used directly in a browser. Go to https://outlook.office.com/ (or https://www.office.com/) and sign in with the new account. Microsoft 365 asks you to change the password: enter the old password and a new one.
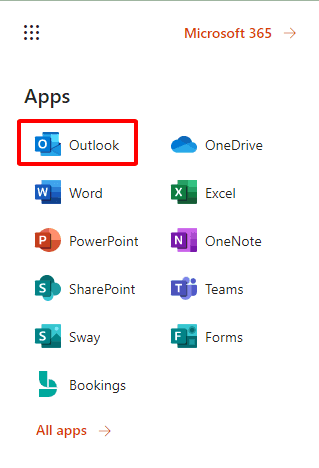
Click the app launcher ☷ and choose Outlook to open your mailbox.
In Outlook, click New mail to write your first email.

Fill in the message:
- To: the recipient’s address
- Cc: additional recipients
- Subject: the message title
- The white area is where you write the message.
Click Send.
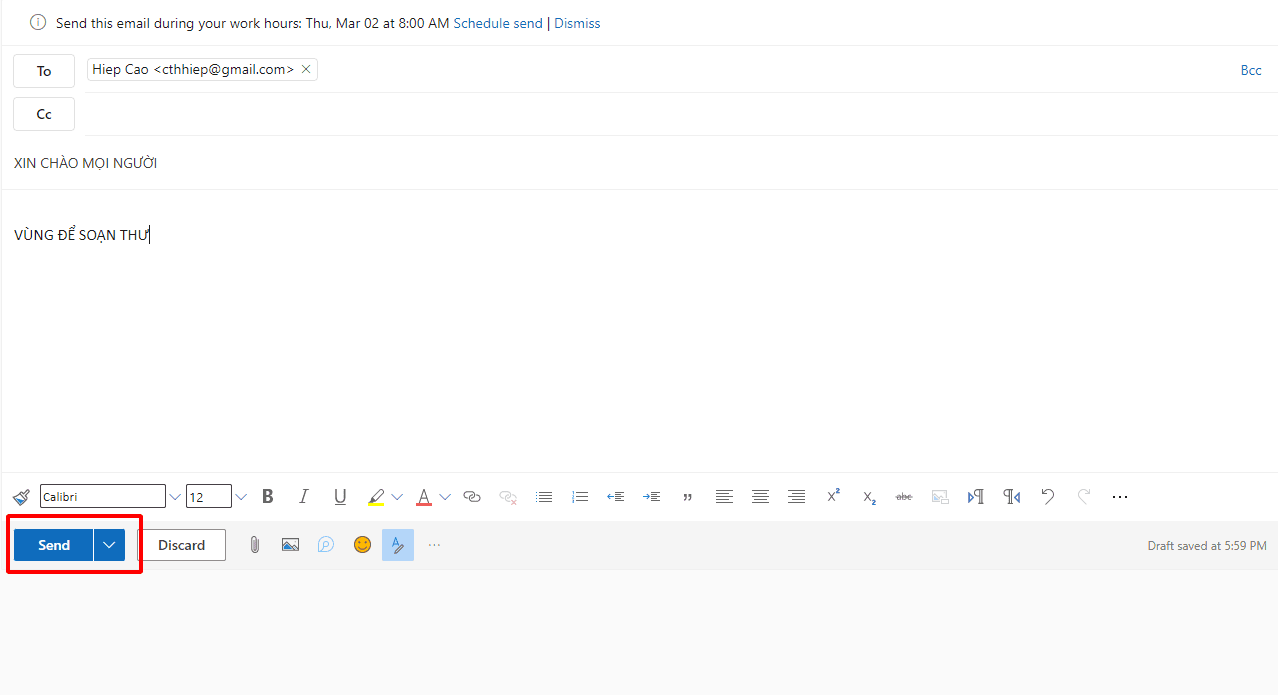
Email sent successfully
The screenshot below shows the message sent and received by the recipient.
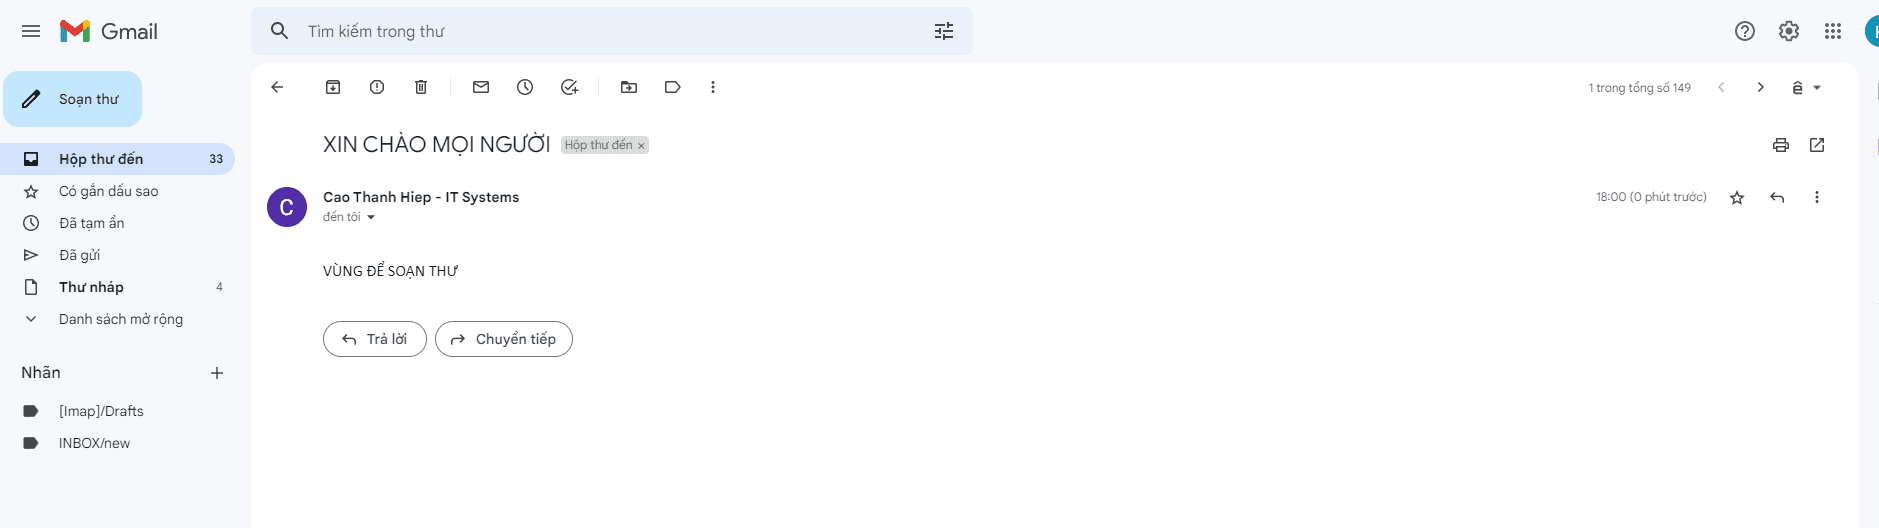
Email received successfully
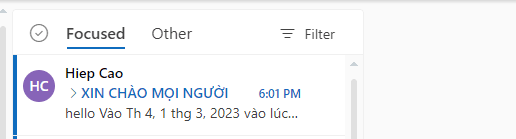
With these steps you have created a mailbox and used it in Outlook on the web.
Tips for using Outlook
Protect your account: use a strong password mixing upper- and lower-case letters, numbers and symbols, never share it, and turn on multi-factor authentication to stop unauthorised sign-ins.
Make the most of OneDrive: store attachments in OneDrive instead of on your computer to save space and access files from any device, with sync, sharing and recovery of deleted files.
Personalise Outlook: change the theme, fonts, text size and folder layout in Settings to work more comfortably.
Find help: Microsoft’s online support centre has detailed guides and videos, and the Outlook community is a useful resource.
Organise email: create folders by project or client and use rules to sort messages automatically.
Use search: search by sender, subject, keyword or message content, using precise keywords and search operators.
Keep Outlook updated: Microsoft regularly releases updates with new features and fixes.
For Microsoft 365 deployment and administration for your business, contact IT Systems at hotline 028.3995.03.59 or contact@itsystems.com.vn.
Email or Outlook problems across your team?
IT Systems deploys Microsoft 365, migrates email, sets up security and supports users on Outlook, Teams and OneDrive.