


Summary: To add email on an iPhone or iPad, go to Settings > Mail, choose Add Account > Other > Add Mail Account, enter your name, email address and password, choose IMAP or POP and fill in the incoming and outgoing server details. This guide explains each step with screenshots.
To set up POP or IMAP access to your email on an Apple iPhone or iPad, follow these steps:
How to add email on iPhone/iPad: go to Settings > Mail > Accounts > Add Account (on iOS 18: Settings > Apps > Mail > Mail Accounts). For Gmail, Outlook or Yahoo, choose the provider and sign in. For a custom-domain address, choose Other > Add Mail Account, enter your name, email address, password and description > Next; choose IMAP (recommended, syncs across devices) or POP, then enter the incoming server (IMAP 993 SSL / POP 995) and outgoing server (SMTP 587 or 465 with authentication) from your provider > Save. Send and receive a test message. Outlook users can install the Microsoft Outlook app from the App Store instead of the built-in Mail app.
1. Open Settings and go to Mail accounts
Open Settings and choose Mail (on older iOS versions: Mail, Contacts, Calendars).
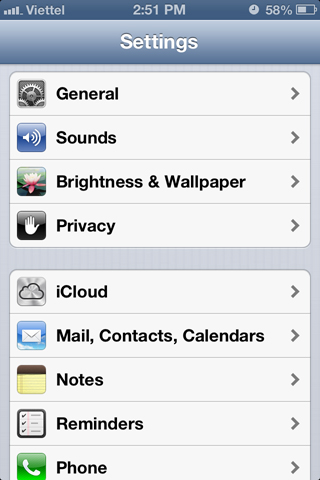
2. Tap Add Account
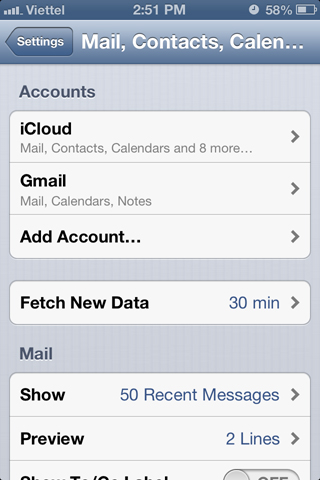
3. Tap Other
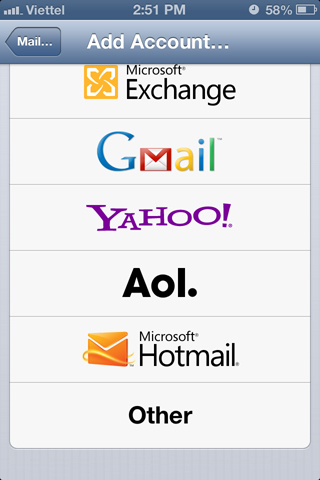
4. Tap Add Mail Account
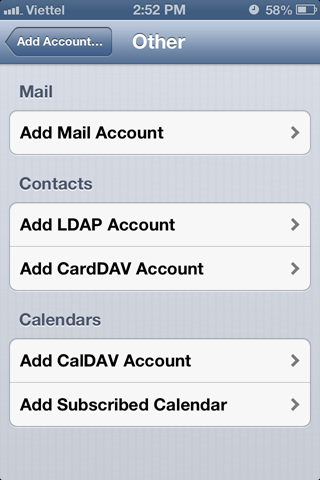
5. Enter your name, email address and password
Enter your name in Name, your address in Email and your password in Password. Description is a label for the account; the device suggests one based on your domain, and you can change it. Tap Next.
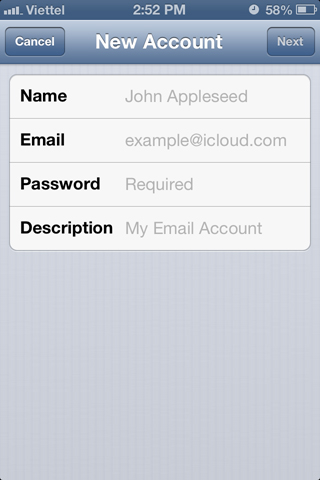
6. Choose IMAP or POP and enter the incoming mail server
Choose IMAP (recommended) or POP. Under Incoming Mail Server, enter your mail server name in Host Name (often mail.yourdomain.com), your full email address in User Name and your password in Password.
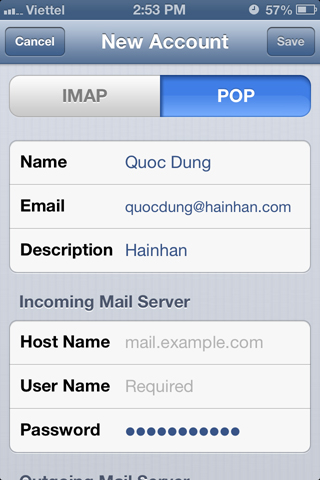
7. Enter the outgoing mail server
Under Outgoing Mail Server, enter the same details as for the incoming server, then tap Save.
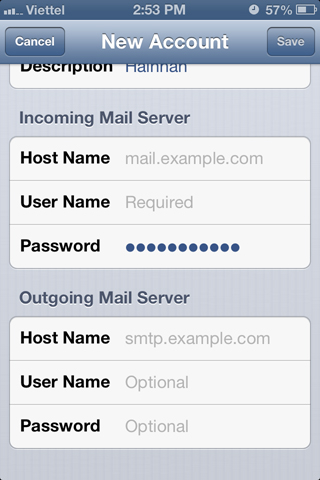
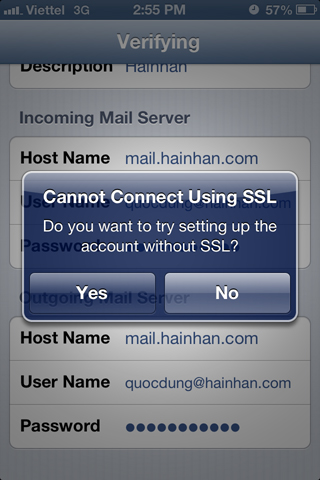
8. If the device cannot connect using SSL
If iOS reports that it cannot connect using SSL, first check the server name with your email provider. Only choose to continue without SSL if your provider explicitly requires it; this is not recommended because your password and email would be sent unencrypted.
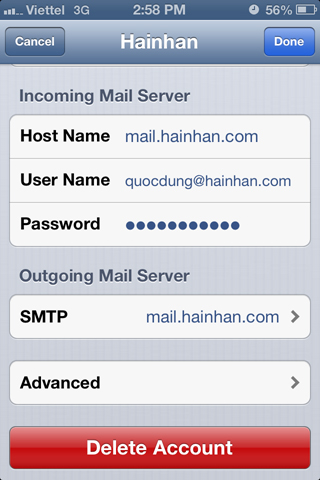
9. Open the outgoing server settings
After saving, the account page appears. Scroll down to Outgoing Mail Server and tap SMTP.
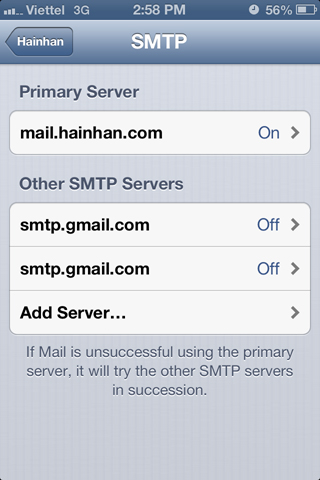
10. Select the primary server
Under Primary Server, tap your mail server name (usually mail.yourdomain.com).
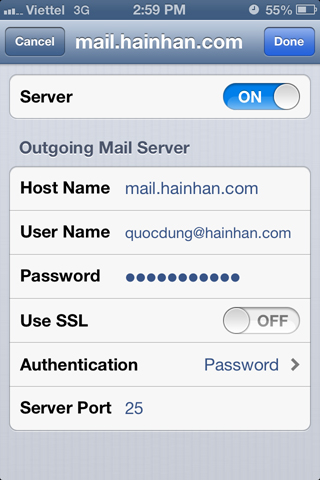
11. Set the port and SSL
Turn Use SSL on and set Server Port to 465 (or use port 587 with SSL/STARTTLS, as your provider specifies). Make sure authentication is set to password. Tap Done to save. Avoid port 25, which many networks block and which is not encrypted.
Setup is complete, and you can now use your custom-domain email on your Apple devices. For company email setup and support, contact IT Systems at hotline 028.3995.03.59 or contact@itsystems.com.vn.
Email or Outlook problems across your team?
IT Systems deploys Microsoft 365, migrates email, sets up security and supports users on Outlook, Teams and OneDrive.


